
Why Pure Titanium Changes Espresso Extraction: MUVNA 58mm Precision Filter Basket Review
Elevate espresso extraction clarity with the MUVNA 58mm Pure Titanium Precision Filter Basket. Laser-cut micro holes, zero metal taint &...
read more
Jul
There is something magical about sipping a hot cup of coffee while watching the sunrise over a mountain lake. But if you have ever tried making coffee while camping, you know the challenge: instant coffee just does not cut it, and hauling a full espresso machine up a trail is not exactly practical.
The good news? With the right tools and techniques, you can brew barista-quality coffee anywhere from your campsite to your car, from a hotel room to a backpacking adventure. And no, you do not need electricity or a kitchen full of equipment.
In this guide, we will show you exactly how to brew exceptional coffee outdoors, featuring three essential tools that make it possible.
Here is a truth most coffee shops will not tell you: the single biggest factor in coffee quality is not the brewing method - it is the freshness of your grind. Pre-ground coffee starts losing flavor within minutes of exposure to air. By the time you open that bag at your campsite, most of the delicate aromatics that make coffee special have already escaped.
The solution? Grind your beans right before brewing. And for that, you need a reliable grinder that works without electricity.
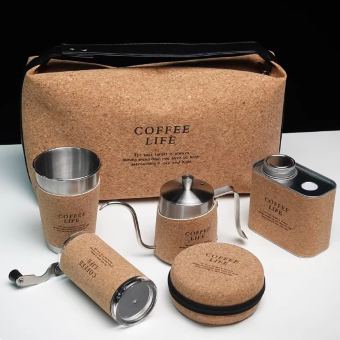
If you are the type who plans camping trips around coffee stops, the Manual Coffee Grinder and Filter Cup Set is your perfect companion. This is not just a grinder - it is a complete outdoor brewing system that fits in your backpack.
Why it works: The ceramic conical burrs crush beans consistently, unlike blade grinders that chop unevenly. Ceramic does not heat up during grinding (which preserves flavor), and the adjustable grind settings mean you can dial in the perfect coarseness for your preferred brew method.
The included stainless steel filter cup eliminates the need for paper filters - just add grounds and hot water. The double-wall insulation keeps your hands from burning while maintaining optimal brewing temperature.
View Manual Coffee Grinder and Filter Cup Set
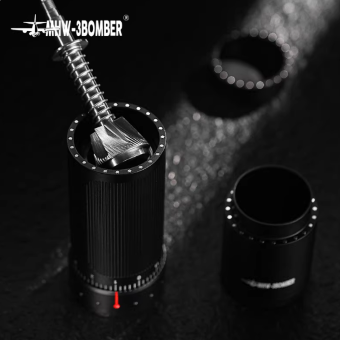
For those who prefer convenience without sacrificing quality, a Wireless Coffee Grinder offers the best of both worlds. Rechargeable via USB and small enough to toss in your daypack, this grinder lets you enjoy fresh grounds anywhere even on a road trip or at the office.
With adjustable grind thickness settings, you can switch between coarse grounds for cold brew and fine grounds for espresso-style shots. The rechargeable battery handles multiple grind sessions on a single charge, making it ideal for multi-day camping trips.
Once you have got fresh grounds, the next question is: how do you filter your brew? Many campers overlook this step, but the right filter paper can dramatically improve your cup.
KALITA Filter Papers from Japan represent the gold standard for pour-over brewing. The waved paper structure allows optimal water flow while trapping sediment, resulting in a clean, bright cup that highlights the natural flavors of your beans.
Unlike cheap filters that impart papery flavors, premium KALITA papers are designed to be neutral letting your coffee shine through without interference. They are available in two sizes: No.155 for 1-2 cups and No.185 for 2-4 cups.
Now let us put it all together. Here is a simple method that works anywhere you have hot water:
Step 1: Heat Your Water
If you are camping, use a portable stove or campfire to heat water. You want it hot but not boiling around 200F is ideal. If you do not have a thermometer, bring water to a boil and let it sit for 30 seconds.
Step 2: Grind Your Beans
For pour-over coffee, aim for a medium grind think sea salt consistency. If using the Manual Grinder and Filter Cup Set, adjust the setting until you get uniform particles. With the Wireless Grinder, experiment with the thickness settings to find your preference.
Step 3: Set Up Your Filter
Place your KALITA filter paper in your dripper and rinse it with a small amount of hot water. This removes any paper taste and warms your brewing vessel.
Step 4: Add Coffee and Bloom
Add your grounds to the filter, then pour just enough water to wet them (about twice the weight of the coffee). Wait 30-45 seconds this bloom releases CO2 and prepares the coffee for even extraction.
Step 5: Pour in Circles
Slowly pour the remaining water in a steady, circular motion from the center outward. Keep the water level consistent and avoid pouring directly onto the filter walls. Total pour time should be around 2-3 minutes.
Step 6: Enjoy
Once the water finishes dripping through, remove the filter and enjoy your fresh cup of outdoor coffee.
You do not need a cafe to enjoy cafe-quality coffee. With fresh beans, a reliable grinder, and the right filter, you can brew exceptional coffee anywhere from a mountain peak to a parking lot.
The investment in quality gear pays off in every cup. And honestly, there is no better way to start a day outdoors than with coffee you ground and brewed yourself.
Coffee begins losing flavor within minutes of grinding. For best results, grind just before brewing. If you must pre-grind, use an airtight container and consume within 24 hours.
For traditional pour-over, you need hot water (195-205F). However, you can make cold brew by steeping coarse grounds in cold water for 12-24 hours perfect for summer camping.
Ceramic burrs stay cooler during grinding, preserving delicate flavors. Steel burrs are more durable but can transfer heat to grounds. For outdoor use, ceramic is preferred.
Plan for about 15-20g of beans per cup. For a weekend trip with two coffee drinkers, bring around 200g (about 7 oz) to be safe.
True espresso requires pressure (9 bars), which is hard to achieve without a machine. However, a Moka pot can produce espresso-like coffee over a camp stove.
Water quality, grind consistency, and water temperature all affect flavor. If your outdoor coffee tastes off, try adjusting these variables or bringing filtered water from home.